SuperRedPig

SuperRedPig

Rainbow Candy
Rainbow Candy
Pink Candy
Pink Candy
Red Candy
Red Candy
Blue Candy
Blue Candy
SOSOSOSOSOSOSOSOSSOSOS
573
Followers
7
Following
13.2K
Runs
3
Downloads
169
Likes

AI Tools

View All
795094937493352415

RealAnime/动漫牛马

858
794403417708702656

会动的二次元世界/real anime video

20
789908158907722637

我和我的动漫角色/Me and my anime characters

40
789851053022545262

SD 1.5 LORA UPSCALER

223
787741712964598990

Trading card of Songminghao

5
787637748986200109

SD3.5 TEXT TO IMAGE

168
787352893884801842

HALLOWEEN Face Swap

44
786989204629555698

s

2
786987503822485189

11

0
786949072455152877

《ΑΡΤ.》Face Swap

186
785026726712500815

asd

64
770930665507176054

asd

9
768819568822032097

【Flux】Black Myth:Wukong’s Mythical Mischief

893
768061833511836576

BlackMyth: Wukong Face Swap

228
769510130843743880

🎖FLUX.1-Rev. Neo β 2

27
763614119998925750

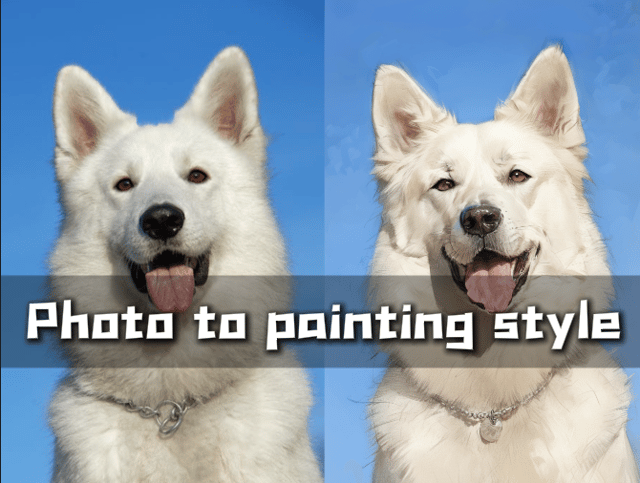
Photo to painting style

270

Articles

View All
Detailed explanation of online training parameters

Detailed explanation of online training parameters

1.Adding and processing datasetsClick "Online Training" on the Tensorart homepage to enter 1.1 Add dataset1.1.1Dataset l Currently supported formats are png/jpg/jpeg, and up to 1000 images can be added for training.l The uploaded picture can be deleted by clicking on the upper right corner.l It is recommended to upload higher definition images as much as possible for better training resultsl Enhanced datasets can be added, such as cropping and segmentation, image mirroring/flipping 1.1.2Regularized datasetl Regularization technology is widely used in Machine Learning and Deep learning algorithms. Its essential function is to regularize and reduce the weight of training materials, prevent overfitting, and improve Model Generalization Ability.l We can upload regularized datasets here, and the regularized dataset can be generated using the base model used for training.l For pure beginners who are completely unfamiliar with the training process, not using regular expression datasets may achieve better results.Please do not upload any illegal images such as bloody/violent/yellow/political images. Uploading illegal images multiple times may result in account suspensiorn 1.2 Batch clipping  1. Cutting method:Focus cropping: crop according to the main content of the picture. Center Crop: Crop the central part of the picture2. Choose the cutting size according to the training bottom filmSD1.5 optional sizes:n 512x468n 512x512n 768x512SDXL optional sizes:n 768x1024n 1024x1024n 1024x7681.3 Automatic markingEach uploaded image will be automatically tagged, and thetag content can be viewed by clicking on the image. In addition, you can also add and delete image tags. 1. If the training character wants to fix certain features, the procompt word for that feature can bedeleted2.Any AI automatic labeling cannot be 100% accurate. Ifpossible, manually screen once to eliminate incorrect labeling and improve the quality ofthe mode  1.4 Batch labelingCurrently, it supports adding tags to images in batches. You can choose to add them to the beginning or end of the line. Generally, they are added to the first line as a trigger word. 2.Training parameter settings 2.1 Set the number of repetitionsThe number of repetitions of image training, that is, the repeat parameter. Generally speaking, when training locally, this parameter needs to be adjusted separately in the training dataset folder In the online training workbench of Tensorart, we can change thenumber of repetitions of individual images from here. If you upload an enhanced dataset on it, you can sset different repetitions here 2.2 Base modelModel theme & base model selection: The model presets different training parameters according to different themes. Choosing the appropriate base model will make your Model Training twice as effective! Note: LoRA between different XL models is unlikely to be universal, please choose the base model carefully Two-dimensional characters: Optional base model AnythingV5/Animagine XL/Kohaku-XL Delta, training SD1.5 two- dimensional character LoRA requires AnythingV5, training SDXL LORA requires Animagine XL/Kohaku-XL Real person: Optional base model EpiCRealism (SD 1.5)/Juggernaut XL (SDXL). Some parameters of the training haVe been preset, and you can adjust the relevant parameters according to your needs 2.5D: Optional base model DreamShaper/GuoFeng3/DreamShapper XL1.0/GuoFeng4 XL, training SD1.5 LoRA requires DreamShaper/GuoFeng3, training SDXL LORA requires DreamShaper XL1.0/GuoFeng4 XL Standard: Default use of SDXL1.0/SD1.5 base as the training model, if not special needs, it is not recommended to useSingle Repeat (Repeat):Repeat refers to the number oftimes AI learns for each image, where Repeat only takes effect for imagesthat have not been set separatelyTraining rounds (Epoch): Epoch refers to a cycle of AI learnirng from your images. After all the images have completed Repeat, tthis is an Epoch. Total Steps: see the supplement below the table Model Effect Preview Prompt Word: The prompt word Ihere is a preset image for each version saved by Epoch, used to preview tthe training effect of the model This parameter does not affect the training effect and the qualitof the model, and is only used as a real-time preview graph parameter The formula for calculating the total number of steps is:(Number of images in the training dataset Repeat Epoch)The total number of steps directly affects the computing power con:sumption of Model Training, and the more steps, the greater the computing power consumption 2.3 Professional modeIt is not recommended for beginners to use professional mode Number of repetitions per image (Repeat): Repeat refers to the number of times AI learns from each imageTraining rounds (Epoch): Epoch refers to a cycle of AI learning from your images. After all the images have completed Repeat, this is an Epoch. The formula for calculating the total number ofsteps is:Number of images in the training dataset * Repeat* EpochThe total number of steps will directly affect the computing power consumption of Model Training. The more steps, the greater the computing power consumption Seed (seed): (metaphysics, random can be)Text Encoder Learning Rate : Adjust the sensitivity of the entire model to tags If you find unnecessary items during the image generation process, you need to reduce the TE Learning Rate; if you find it difficult to make the content appear without heavily weighting the prompts, you need to increase the TE Learning Rate. Unet Learning Rate: the speed and degree of model learning High Learning Rate can make AI learn faster, but may lead to Overfitting. If the model cannot replicate the details and the generated graph does not look alike, then the Learning Rate is too low. Try increasing the Learning Rate Learning Rate Scheduler: Scheduler refers to "how to set the change of Learning Rate" Optimizer: The optimizer is set up to update the weights of neural networks during training. Various methods have been proposed for intelligent training. Training grid size Dim: DIM represents the dimension of neural networks. The larger the dimension, the stronger the expression ability of the model, and the larger the final volume of the model. DIM is not the bigger the better. For a single character LORA, there is no need to open 128 for DIM. Training Network Alpha Value:While keeping the actual (saved) lora weight value large, always weaken the weight by a certain proportion during training to make the weight value appear smaller. This "weakening ratio" is Network Alpha. The smaller the Network Alpha value, the larger the weight value of the stored LoRA neural networks. Don't adjust the default parameters at will in professional mode, which may lead to even more outrageous results. If you are not sure what a certain parameter is for, try not to adjust it. Newbie recommends using basic mode. Scrambling labels: Usually, the earlier the word in the title, the more important it is. Therefore,if the order of the words is fixed, the following words may not be well learned, or the previous words may have unexpected associations with image generation. By randomly changing the order of the words each time the image is loaded, this bias can be corrected. Keep the Nth token: The first n words specified will always remain at the front of the title, which can be used to set the trigger word. Here, "word" refers to text separated by commas. Regardless of how many words the separated text contains, it is considered as "1 word". For example, for "black cat, eating, sitting", "black cat" is considered as 1 word. Noise offset: add noise offset in training to improve the generation of very dark or very bright images, not too large, try to be below 0.2 Multi-resolution noise attenuation rate: Multiple resolution noise iterations: Convolution layer dimension: Convolution layer Alpha value: Prompt word, sampling algorithm: The prompt word and sampling algorithm here are preset images for each version saved by Epoch, used to preview the training effect of the model 3.Training processBecause a machine can only run one Model Training task at the sanhe time, please be patient when facing possible queuing situations. We will prepare the training machine foyou assoon as possible. You can also perform staggered training at night 4.Model testingCurrently, after finding a suitable model for the example diagram and publishing it, do not upload display images (no images for display will be distributed to the homepage).After the deployment is completed, you can test your own model on the workbench. 5.Model release/download/retrain After the training is completed, you will see four preview images ofeach Epoch. You can choose the satisfactory works to publish in Tensorart or save them locally. If you are not satisfied with this training, you can view the training parameters and retrain in the upper right cornher. The specific method of adjusting parameters can be found in the above instructions. 
6
1
Hunyuan model online training tutorial

Hunyuan model online training tutorial

EnglishToday, Iwill teach you how to use TensorArt to train an Hunyuan model online.Step 1: Open “Online Training.On the left side, you will see the dataset window, which is empty by default. You can upload some images to create a dataset or upload a dataset zip file. The zip file can include annotation files, following the same format as kohya-ss, where each image file corresponds to a text annotation file with the same name.In the model theme section on the right, you can choose from options such as anime characters, real people, 2.5D, standard, and custom.Here, we select “Base” and choose the Hunyuan model as the base model.For the base model parameter settings, we recommend setting the number of repetitions per image to 4 and the number of epochs to 16.、After uploading a processed dataset, if your dataset annotations include character names, you don’t need to specify a trigger word. Otherwise, you should assign a simple trigger word to your model, such as a character name or style name.Next, select an annotation file from the dataset to use as a preview prompt.If you want to use Professional Mode, click the button in the top right corner to switch to Professional Mode.In Professional Mode, it is recommended to double the learning rateand use the cosine_with_restarts learning rate scheduler. For the optimizer, you can choose AdamW8bit.Enable label shuffling and ensure that the first token remains unchanged (especially if you have a character name trigger word as the first token).Disable the noise offset feature, and you can set the convolution DIM to 8 and Alpha to 1.In the sample settings, add the Negative prompts, and then you can start the training process.In the training queue, you can view the current loss value chart and the four sample images generated for each epoch.Finally, you can choose the epoch with the best results to download to your local machine or publish directly on TensorArt.After a few minutes, your model will be deployed and ready.日本語今日、私はTensorArtを使用してHunyuanモデルをオンラインでトレーニングする方法を教えます。ステップ1: 「オンライントレーニング」を開きます。左側にデータセットウィンドウが表示され、デフォルトでは空です。データセットを作成するために画像をアップロードするか、データセットのzipファイルをアップロードできます。zipファイルには、kohya-ssと同じ形式のアノテーションファイルを含めることができ、各画像ファイルには同じ名前のテキストアノテーションファイルが対応しています。右側のモデルテーマセクションでは、アニメキャラクター、実在の人物、2.5D、標準、カスタムなどのオプションから選択できます。ここでは「Base」を選択し、Hunyuanモデルをベースモデルとして選びます。ベースモデルのパラメーター設定では、画像ごとの繰り返し回数を4、エポック数を16に設定することをお勧めします。 処理済みのデータセットをアップロードした後、データセットのアノテーションにキャラクター名が含まれている場合は、トリガーワードを指定する必要はありません。それ以外の場合は、キャラクター名やスタイル名など、モデルに簡単なトリガーワードを割り当ててください。 次に、プレビュー用プロンプトとして使用するために、データセットからアノテーションファイルを選択します。プロフェッショナルモードを使用したい場合は、右上隅のボタンをクリックしてプロフェッショナルモードに切り替えます。プロフェッショナルモードでは、学習率を倍増することをお勧めします。また、cosine_with_restarts学習率スケジューラーを使用してください。オプティマイザーとしては、AdamW8bitを選択できます。ラベルシャッフルを有効にし、最初のトークンが変更されないようにします(特にキャラクター名トリガーワードが最初のトークンの場合)。ノイズオフセット機能を無効にし、畳み込みDIMを8、Alphaを1に設定できます。サンプル設定でNegative promptsを追加し、その後、トレーニングプロセスを開始できます。トレーニングキューでは、現在の損失値チャートと各エポックごとに生成された4つのサンプル画像を表示できます。最後に、最良の結果が得られたエポックを選択して、ローカルマシンにダウンロードするか、直接TensorArtで公開できます。数分後には、モデルがデプロイされ、使用可能になります。한국인오늘은 TensorArt를 사용하여 Hunyuan 모델을 온라인에서 훈련하는 방법을 알려드리겠습니다.1단계: “온라인 훈련”을 엽니다.왼쪽에는 기본적으로 비어 있는 데이터셋 창이 표시됩니다. 데이터셋을 만들기 위해 이미지를 업로드하거나 데이터셋 zip 파일을 업로드할 수 있습니다. zip 파일에는 kohya-ss와 같은 형식의 주석 파일이 포함될 수 있으며, 각 이미지 파일에는 동일한 이름의 텍스트 주석 파일이 대응됩니다.오른쪽의 모델 테마 섹션에서는 애니메이션 캐릭터, 실제 인물, 2.5D, 표준, 사용자 정의 등 다양한 옵션 중에서 선택할 수 있습니다.여기에서는 “Base”를 선택하고 Hunyuan 모델을 기본 모델로 선택합니다.기본 모델 파라미터 설정에서는 이미지당 반복 횟수를 4로, 에포크 수를 16으로 설정하는 것을 권장합니다. 처리된 데이터셋을 업로드한 후, 데이터셋의 주석에 캐릭터 이름이 포함되어 있으면 트리거 단어를 지정할 필요가 없습니다. 그렇지 않으면 모델에 간단한 트리거 단어를 지정해야 합니다, 예를 들어 캐릭터 이름이나 스타일 이름 등. 다음으로, 미리 보기 프롬프트로 사용할 주석 파일을 데이터셋에서 선택합니다.전문 모드를 사용하려면, 오른쪽 상단의 버튼을 클릭하여 전문 모드로 전환합니다.전문 모드에서는 학습률을 두 배로 늘리는 것이 좋습니다.또한 cosine_with_restarts 학습률 스케줄러를 사용합니다. 옵티마이저로는 AdamW8bit을 선택할 수 있습니다.레이블 셔플을 활성화하고 첫 번째 토큰이 변경되지 않도록 합니다(특히 캐릭터 이름 트리거 단어가 첫 번째 토큰인 경우).노이즈 오프셋 기능을 비활성화하고, 컨볼루션 DIM을 8로, Alpha를 1로 설정할 수 있습니다.샘플 설정에서 Negative prompts를 추가한 후, 훈련 프로세스를 시작할 수 있습니다.훈련 대기열에서 현재 손실 값 차트와 각 에포크에 대해 생성된 4개의 샘플 이미지를 볼 수 있습니다.마지막으로, 가장 좋은 결과를 얻은 에포크를 선택하여 로컬 컴퓨터로 다운로드하거나 직접 TensorArt에 게시할 수 있습니다.몇 분 후, 모델이 배포되고 사용 가능해집니다.Tiếng ViệtHôm nay, tôi sẽ hướng dẫn bạn cách sử dụng TensorArt để đào tạo mô hình Hunyuan trực tuyến.Bước 1: Mở “Đào tạo trực tuyến.”Ở bên trái, bạn sẽ thấy cửa sổ tập dữ liệu, mặc định là trống. Bạn có thể tải lên một số hình ảnh để tạo tập dữ liệu hoặc tải lên tệp zip của tập dữ liệu. Tệp zip có thể bao gồm các tệp chú thích, theo cùng một định dạng như kohya-ss, trong đó mỗi tệp hình ảnh tương ứng với một tệp chú thích văn bản cùng tên.Ở phần chủ đề mô hình bên phải, bạn có thể chọn từ các tùy chọn như nhân vật anime, người thật, 2.5D, tiêu chuẩn và tùy chỉnh.Tại đây, chúng ta chọn “Base” và chọn mô hình Hunyuan làm mô hình cơ bản.Đối với cài đặt tham số của mô hình cơ bản, chúng tôi khuyên bạn nên đặt số lần lặp lại trên mỗi hình ảnh là 4 và số epoch là 16. Sau khi tải lên tập dữ liệu đã xử lý, nếu các chú thích của tập dữ liệu của bạn bao gồm tên nhân vật, bạn không cần phải chỉ định từ kích hoạt. Ngược lại, bạn nên gán một từ kích hoạt đơn giản cho mô hình của mình, chẳng hạn như tên nhân vật hoặc tên phong cách. Tiếp theo, chọn một tệp chú thích từ tập dữ liệu để sử dụng làm lời nhắc xem trước.Nếu bạn muốn sử dụng Chế độ Chuyên nghiệp, hãy nhấp vào nút ở góc trên bên phải để chuyển sang Chế độ Chuyên nghiệp.Trong Chế độ Chuyên nghiệp, nên gấp đôi tỷ lệ học.Và sử dụng bộ lập lịch tỷ lệ học cosine_with_restarts. Đối với bộ tối ưu hóa, bạn có thể chọn AdamW8bit.Kích hoạt xáo trộn nhãn và đảm bảo rằng mã thông báo đầu tiên không thay đổi (đặc biệt nếu bạn có từ kích hoạt tên nhân vật là mã thông báo đầu tiên).Tắt tính năng dịch chuyển tiếng ồn và bạn có thể đặt DIM tích chập là 8 và Alpha là 1.Trong cài đặt mẫu, thêm các Lời nhắc tiêu cực, sau đó bạn có thể bắt đầu quá trình đào tạo.Trong hàng đợi đào tạo, bạn có thể xem biểu đồ giá trị tổn thất hiện tại và bốn hình ảnh mẫu được tạo ra cho mỗi epoch.Cuối cùng, bạn có thể chọn epoch có kết quả tốt nhất để tải xuống máy tính của bạn hoặc xuất bản trực tiếp trên TensorArt.Sau vài phút, mô hình của bạn sẽ được triển khai và sẵn sàng sử dụng.españolHoy, te enseñaré cómo usar TensorArt para entrenar un modelo Hunyuan en línea.Paso 1: Abre “Entrenamiento en línea.”A la izquierda, verás la ventana del conjunto de datos, que está vacía por defecto. Puedes subir algunas imágenes para crear un conjunto de datos o subir un archivo zip del conjunto de datos. El archivo zip puede incluir archivos de anotación, siguiendo el mismo formato que kohya-ss, donde cada archivo de imagen corresponde a un archivo de anotación de texto con el mismo nombre.En la sección de temas del modelo a la derecha, puedes elegir entre opciones como personajes de anime, personas reales, 2.5D, estándar y personalizado.Aquí, seleccionamos “Base” y elegimos el modelo Hunyuan como el modelo base.Para la configuración de parámetros del modelo base, te recomendamos configurar el número de repeticiones por imagen a 4 y el número de épocas a 16. Después de subir un conjunto de datos procesado, si las anotaciones de tu conjunto de datos incluyen nombres de personajes, no necesitas especificar una palabra de activación. De lo contrario, deberías asignar una palabra de activación simple a tu modelo, como un nombre de personaje o un nombre de estilo. A continuación, selecciona un archivo de anotación del conjunto de datos para usarlo como un aviso de vista previa.Si deseas usar el Modo Profesional, haz clic en el botón en la esquina superior derecha para cambiar al Modo Profesional.En el Modo Profesional, se recomienda duplicar la tasa de aprendizaje.Y usar el programador de tasa de aprendizaje cosine_with_restarts. Para el optimizador, puedes elegir AdamW8bit.Habilita el barajado de etiquetas y asegúrate de que el primer token permanezca sin cambios (especialmente si tienes una palabra de activación de nombre de personaje como el primer token).Desactiva la función de desplazamiento de ruido y puedes configurar el DIM de convolución a 8 y Alpha a 1.En la configuración de muestra, añade los Avisos Negativos, y luego puedes comenzar el proceso de entrenamiento.En la cola de entrenamiento, puedes ver el gráfico del valor de pérdida actual y las cuatro imágenes de muestra generadas para cada época.Finalmente, puedes elegir la época con los mejores resultados para descargarla a tu máquina local o publicarla directamente en TensorArt.Después de unos minutos, tu modelo estará desplegado y listo para usar.
18
4
Online Training SD3 Model Tutorial

Online Training SD3 Model Tutorial

EnglishToday, Iwill teach you how to use TensorArt to train an SD3 model online.Step 1: Open “Online Training.On the left side, you will see the dataset window, which is empty by default. You can upload some images to create a dataset or upload a dataset zip file. The zip file can include annotation files, following the same format as kohya-ss, where each image file corresponds to a text annotation file with the same name.In the model theme section on the right, you can choose from options such as anime characters, real people, 2.5D, standard, and custom.Here, we select “Base” and choose the SD3 model as the base model.For the base model parameter settings, we recommend setting the number of repetitions per image to 4 and the number of epochs to 16.、After uploading a processed dataset, if your dataset annotations include character names, you don’t need to specify a trigger word. Otherwise, you should assign a simple trigger word to your model, such as a character name or style name.Next, select an annotation file from the dataset to use as a preview prompt.If you want to use Professional Mode, click the button in the top right corner to switch to Professional Mode.In Professional Mode, it is recommended to double the learning rateand use the cosine_with_restarts learning rate scheduler. For the optimizer, you can choose AdamW8bit.Enable label shuffling and ensure that the first token remains unchanged (especially if you have a character name trigger word as the first token).Disable the noise offset feature, and you can set the convolution DIM to 8 and Alpha to 1.In the sample settings, add the Negative prompts, and then you can start the training process.In the training queue, you can view the current loss value chart and the four sample images generated for each epoch.Finally, you can choose the epoch with the best results to download to your local machine or publish directly on TensorArt.After a few minutes, your model will be deployed and ready.日本語今日は、TensorArtを使用してオンラインでSD3モデルをトレーニングする方法を教えます。ステップ1: 「オンライントレーニング」を開きます。左側にデータセットウィンドウが表示され、デフォルトでは空です。データセットを作成するために画像をアップロードするか、データセットのzipファイルをアップロードできます。zipファイルには、kohya-ssと同じ形式のアノテーションファイルを含めることができ、各画像ファイルには同じ名前のテキストアノテーションファイルが対応しています。右側のモデルテーマセクションでは、アニメキャラクター、実在の人物、2.5D、標準、カスタムなどのオプションから選択できます。ここでは、「ベース」を選択し、SD3モデルをベースモデルとして選びます。ベースモデルのパラメーター設定では、画像ごとの繰り返し回数を4、エポック数を16に設定することをお勧めします。 処理済みのデータセットをアップロードした後、データセットのアノテーションにキャラクター名が含まれている場合は、トリガーワードを指定する必要はありません。それ以外の場合は、キャラクター名やスタイル名など、モデルに簡単なトリガーワードを割り当ててください。 次に、プレビュー用プロンプトとして使用するために、データセットからアノテーションファイルを選択します。プロフェッショナルモードを使用したい場合は、右上隅のボタンをクリックしてプロフェッショナルモードに切り替えます。プロフェッショナルモードでは、学習率を倍増することをお勧めします。また、cosine_with_restarts学習率スケジューラーを使用してください。オプティマイザーとしては、AdamW8bitを選択できます。ラベルシャッフルを有効にし、最初のトークンが変更されないようにします(特にキャラクター名トリガーワードが最初のトークンの場合)。ノイズオフセット機能を無効にし、畳み込みDIMを8、Alphaを1に設定できます。サンプル設定でNegative promptsを追加し、その後、トレーニングプロセスを開始できます。トレーニングキューでは、現在の損失値チャートと各エポックごとに生成された4つのサンプル画像を表示できます。最後に、最良の結果が得られたエポックを選択して、ローカルマシンにダウンロードするか、直接TensorArtで公開できます。数分後には、モデルがデプロイされ、使用可能になります。한국인오늘은 TensorArt를 사용하여 SD3 모델을 온라인으로 훈련하는 방법을 가르쳐 드리겠습니다.1단계: “온라인 훈련”을 엽니다.왼쪽에는 기본적으로 비어 있는 데이터셋 창이 표시됩니다. 데이터셋을 만들기 위해 이미지를 업로드하거나 데이터셋 zip 파일을 업로드할 수 있습니다. zip 파일에는 kohya-ss와 같은 형식의 주석 파일이 포함될 수 있으며, 각 이미지 파일에는 동일한 이름의 텍스트 주석 파일이 대응됩니다.오른쪽의 모델 테마 섹션에서는 애니메이션 캐릭터, 실제 인물, 2.5D, 표준, 사용자 정의 등 다양한 옵션 중에서 선택할 수 있습니다.여기에서는 “Base”를 선택하고 SD3 모델을 기본 모델로 선택합니다.기본 모델 파라미터 설정에서는 이미지당 반복 횟수를 4로, 에포크 수를 16으로 설정하는 것을 권장합니다. 처리된 데이터셋을 업로드한 후, 데이터셋의 주석에 캐릭터 이름이 포함되어 있으면 트리거 단어를 지정할 필요가 없습니다. 그렇지 않으면 모델에 간단한 트리거 단어를 지정해야 합니다, 예를 들어 캐릭터 이름이나 스타일 이름 등. 다음으로, 미리 보기 프롬프트로 사용할 주석 파일을 데이터셋에서 선택합니다.전문 모드를 사용하려면, 오른쪽 상단의 버튼을 클릭하여 전문 모드로 전환합니다.전문 모드에서는 학습률을 두 배로 늘리는 것이 좋습니다.또한 cosine_with_restarts 학습률 스케줄러를 사용합니다. 옵티마이저로는 AdamW8bit을 선택할 수 있습니다.레이블 셔플을 활성화하고 첫 번째 토큰이 변경되지 않도록 합니다(특히 캐릭터 이름 트리거 단어가 첫 번째 토큰인 경우).노이즈 오프셋 기능을 비활성화하고, 컨볼루션 DIM을 8로, Alpha를 1로 설정할 수 있습니다.샘플 설정에서 Negative prompts를 추가한 후, 훈련 프로세스를 시작할 수 있습니다.훈련 대기열에서 현재 손실 값 차트와 각 에포크에 대해 생성된 4개의 샘플 이미지를 볼 수 있습니다.마지막으로, 가장 좋은 결과를 얻은 에포크를 선택하여 로컬 컴퓨터로 다운로드하거나 직접 TensorArt에 게시할 수 있습니다.몇 분 후, 모델이 배포되고 사용 가능해집니다.Tiếng ViệtHôm nay, tôi sẽ hướng dẫn bạn cách sử dụng TensorArt để huấn luyện mô hình SD3 trực tuyến.Bước 1: Mở “Đào tạo trực tuyến.”Ở bên trái, bạn sẽ thấy cửa sổ tập dữ liệu, mặc định là trống. Bạn có thể tải lên một số hình ảnh để tạo tập dữ liệu hoặc tải lên tệp zip của tập dữ liệu. Tệp zip có thể bao gồm các tệp chú thích, theo cùng một định dạng như kohya-ss, trong đó mỗi tệp hình ảnh tương ứng với một tệp chú thích văn bản cùng tên.Ở phần chủ đề mô hình bên phải, bạn có thể chọn từ các tùy chọn như nhân vật anime, người thật, 2.5D, tiêu chuẩn và tùy chỉnh.Tại đây, chúng ta chọn “Cơ bản” và chọn mô hình SD3 làm mô hình cơ sở.Đối với cài đặt tham số của mô hình cơ bản, chúng tôi khuyên bạn nên đặt số lần lặp lại trên mỗi hình ảnh là 4 và số epoch là 16. Sau khi tải lên tập dữ liệu đã xử lý, nếu các chú thích của tập dữ liệu của bạn bao gồm tên nhân vật, bạn không cần phải chỉ định từ kích hoạt. Ngược lại, bạn nên gán một từ kích hoạt đơn giản cho mô hình của mình, chẳng hạn như tên nhân vật hoặc tên phong cách. Tiếp theo, chọn một tệp chú thích từ tập dữ liệu để sử dụng làm lời nhắc xem trước.Nếu bạn muốn sử dụng Chế độ Chuyên nghiệp, hãy nhấp vào nút ở góc trên bên phải để chuyển sang Chế độ Chuyên nghiệp.Trong Chế độ Chuyên nghiệp, nên gấp đôi tỷ lệ học.Và sử dụng bộ lập lịch tỷ lệ học cosine_with_restarts. Đối với bộ tối ưu hóa, bạn có thể chọn AdamW8bit.Kích hoạt xáo trộn nhãn và đảm bảo rằng mã thông báo đầu tiên không thay đổi (đặc biệt nếu bạn có từ kích hoạt tên nhân vật là mã thông báo đầu tiên).Tắt tính năng dịch chuyển tiếng ồn và bạn có thể đặt DIM tích chập là 8 và Alpha là 1.Trong cài đặt mẫu, thêm các Lời nhắc tiêu cực, sau đó bạn có thể bắt đầu quá trình đào tạo.Trong hàng đợi đào tạo, bạn có thể xem biểu đồ giá trị tổn thất hiện tại và bốn hình ảnh mẫu được tạo ra cho mỗi epoch.Cuối cùng, bạn có thể chọn epoch có kết quả tốt nhất để tải xuống máy tính của bạn hoặc xuất bản trực tiếp trên TensorArt.Sau vài phút, mô hình của bạn sẽ được triển khai và sẵn sàng sử dụng.españolHoy, les enseñaré cómo utilizar TensorArt para entrenar un modelo SD3 en línea.Paso 1: Abre “Entrenamiento en línea.”A la izquierda, verás la ventana del conjunto de datos, que está vacía por defecto. Puedes subir algunas imágenes para crear un conjunto de datos o subir un archivo zip del conjunto de datos. El archivo zip puede incluir archivos de anotación, siguiendo el mismo formato que kohya-ss, donde cada archivo de imagen corresponde a un archivo de anotación de texto con el mismo nombre.En la sección de temas del modelo a la derecha, puedes elegir entre opciones como personajes de anime, personas reales, 2.5D, estándar y personalizado.Aquí, seleccionamos “Base” y elegimos el modelo SD3 como el modelo base.Para la configuración de parámetros del modelo base, te recomendamos configurar el número de repeticiones por imagen a 4 y el número de épocas a 16. Después de subir un conjunto de datos procesado, si las anotaciones de tu conjunto de datos incluyen nombres de personajes, no necesitas especificar una palabra de activación. De lo contrario, deberías asignar una palabra de activación simple a tu modelo, como un nombre de personaje o un nombre de estilo. A continuación, selecciona un archivo de anotación del conjunto de datos para usarlo como un aviso de vista previa.Si deseas usar el Modo Profesional, haz clic en el botón en la esquina superior derecha para cambiar al Modo Profesional.En el Modo Profesional, se recomienda duplicar la tasa de aprendizaje.Y usar el programador de tasa de aprendizaje cosine_with_restarts. Para el optimizador, puedes elegir AdamW8bit.Habilita el barajado de etiquetas y asegúrate de que el primer token permanezca sin cambios (especialmente si tienes una palabra de activación de nombre de personaje como el primer token).Desactiva la función de desplazamiento de ruido y puedes configurar el DIM de convolución a 8 y Alpha a 1.En la configuración de muestra, añade los Avisos Negativos, y luego puedes comenzar el proceso de entrenamiento.En la cola de entrenamiento, puedes ver el gráfico del valor de pérdida actual y las cuatro imágenes de muestra generadas para cada época.Finalmente, puedes elegir la época con los mejores resultados para descargarla a tu máquina local o publicarla directamente en TensorArt.Después de unos minutos, tu modelo estará desplegado y listo para usar.
1
How to set up Radio Button in your AI Tools

How to set up Radio Button in your AI Tools

Hello everyone! ✨ Today I will bring you a super practical tutorial: How to set up a convenient prompt word radio version for your AI Tools! 😎 Save it quickly, and you will never have to worry about how to set prompt words again! 👌Are you ready for the course? Let's get started! 🔍First, the first step is to open the official website of TensorArt. 📂 After opening, you will see a variety of AI tools and resources, which are very rich~ 👀Next, open comfyflow and start making our AI Tool! 🤖 This process is simple and fun, let's explore it together! ✨In comfyflow, we click the "New" button, which will take you to a new interface~ 🖱️💻In this interface, we can start creating our own workflow~ 🌟🎉 Next, we need to fill in the positive prompt words, which is a super critical step! 📝✨In the positive prompt word area, we need to enter the content we want. 📋 Here, the editor simply wrote an example for everyone: "a man". 🤵 This example is just for the convenience of teaching, you can freely play according to your needs~ 🌈🎆🎉 When you have completed the workflow, you can click the "Publish" button in the upper right corner! 🚀✨Don't forget to give your AI Tool an interesting name! 💡 This name will make your tool more attractive~✨ In addition, remember to divide the area correctly, so that you can see it clearly and it is also convenient for your friends to find and use it! 📂🔍🌟 Next, let's complete the next step together! 💪We pull down the current interface and find the user-configurable settings area. 👏 Then click the "Add" button. This step is very critical! 🖱️✨ Everyone must remember to add your positive prompt word node! 🔍✨After adding the node, our next step is to click the "Set" button on the right to proceed to the next step. 🔧✨ This step is crucial! Don't miss it! 😉🚀✨ The next step is also very important! 😊First, click the radio button, then click "Add". 🔘✨ Here, you can add the buttons you want to release to the user! 👍 After selecting, be sure to click "Confirm"! ✔️✨Friends, we have finally reached the last step! 🎉💪 This is an exciting moment! ✨When you have completed all the operations, remember to click the "Publish" button to publish your AI gadget! 🚀✨ Can't wait to see the results? Hurry up and generate a picture yourself to try and experience your results! 🌟🖼️Well, that's all for today's tutorial! 😊 I hope everyone can complete it successfully and create their own AI gadgets! 👏 If you have any questions, don't hesitate to leave a comment in the comment section at any time! ❤️
31
5