Philosophy.AI

Philosophy.AI

Rainbow Candy
Rainbow Candy
Green Candy
Green Candy
Blue Candy
Blue Candy
Rideo ergo sum
229
Followers
98
Following
2.4K
Runs
25
Downloads
772
Likes
Latest
Most Liked
Comparing LORA, LOKR (LyCORIS), and DORA - HALLOWEEN2024

Comparing LORA, LOKR (LyCORIS), and DORA - HALLOWEEN2024

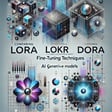
In the world of AI generative models like Stable Diffusion, various fine-tuning methods are used to tailor the model’s output to specific needs. LORA, LOKR (also known as LyCORIS), and DORA are three popular techniques that help models produce images more aligned with user preferences. In this article, we will explore each method, along with their advantages and disadvantages, and compare which models work best with them—whether it’s Stable Diffusion 1.5, SDXL, or the latest FLUX from Black Forest Lab. We’ll also discuss their suitability for different visual styles like anime, realistic, or complex concepts.1. LORA (Low-Rank Adaptation)LORA is a fine-tuning technique designed to modify models quickly and efficiently. It uses low-rank matrix adaptation, which allows small changes to be made without altering the entire model’s parameters.Advantages of LORA:Lightweight and Fast: Because only a few parameters are changed, the process is fast and resource-efficient.Versatility: Suitable for various styles, whether anime, realistic, or abstract concepts.Efficient: Requires less computational power compared to full fine-tuning.Disadvantages of LORA:Limited Detail: Since it only modifies a small part of the model, LORA may not be optimal for highly detailed or complex concepts.2. LOKR (LyCORIS)LOKR, or LyCORIS, is an advanced version of LORA that allows more flexible and deeper modifications, especially for complex use cases.Advantages of LOKR:Deeper Fine-Tuning: Allows more intricate and detailed adjustments than LORA.Ideal for Complex Concepts: Perfect for fine-tuning highly complex or abstract styles.Greater Flexibility: Works well across different outputs, from anime to realistic and abstract styles.Disadvantages of LOKR:More Resource-Intensive: Since it goes deeper into the model, it takes more time and computing power.Harder to Use: It’s more complicated for new users unfamiliar with fine-tuning techniques.3. DORADORA is a newer fine-tuning technique focused on optimizing large model settings. It offers broader flexibility than LORA and LOKR, and provides more consistent results in some cases.Advantages of DORA:High Consistency: DORA yields more consistent results in creating images aligned with the dataset used.Great for Complex Styles: Better suited for projects requiring highly detailed or specific visual styles.Broad Flexibility: Can be used for various image types, including realistic, anime, and abstract styles.Disadvantages of DORA:Complex and Slow: DORA requires more time and computational resources compared to LORA and LOKR.Not Beginner-Friendly: Its setup and processes are more challenging, especially for new users.Which Model is Best for Fine-Tuning?When it comes to fine-tuning, three key models are often used: Stable Diffusion 1.5, SDXL, and FLUX from Black Forest Lab. Let’s see which works best with each fine-tuning method:Stable Diffusion 1.5:An older but stable model. Ideal for LORA since it’s lighter and easier to handle.Suitable for simpler and realistic styles.Stable Diffusion SDXL:A newer version with the ability to generate more detailed and complex images.Excellent for LOKR and DORA as it can manage more intricate and in-depth concepts.FLUX (Black Forest Lab):The latest model offering high flexibility and optimization for various visual styles.Perfect for all fine-tuning techniques, especially DORA, as it handles larger and more detailed data.ConclusionIf you’re looking for a lightweight and fast fine-tuning solution, LORA is a great option. However, for more detailed and complex concepts, LOKR or DORA will give better results. Choosing the right model is also crucial: for simple styles, Stable Diffusion 1.5 is sufficient, but for more detailed or abstract images, SDXL or FLUX are better suited.Recommendations:Anime Style: LORA with Stable Diffusion 1.5 or SDXL works well for generating good anime-style images.Realistic Style: Use DORA on SDXL or FLUX for more detailed and realistic results.Complex Concepts: LOKR or DORA on SDXL or FLUX are the best choices for generating highly complex visual concepts.This guide should help you better understand the differences between LORA, LOKR, and DORA, and how to choose the right model for your AI generative fine-tuning needs!
This is the list of helpful articles (on going)

This is the list of helpful articles (on going)

1. Resource List: Characters in FLUXBy kftiger at CivitaiThis is a dynamic list of characters that already exist in the FLUX base dataset that do not require any additional LORAs to produce, only needing to be named in your prompts.Example from Real People:Albert Einstein, Angela Lansbury (Young), Angelina Jolie, Arnold Schwarzenegger, Barack Obama, Bill Clinton, Bruce Lee, Bruiser Brody, Colin Baker, Daniel Craig, DJ Marshmello, Donald Trump, Dwayne Johnson, Emma Stone, Fairuza Balk, George W Bush, Hulk Hogan, Jackie Chan (50/50), Joe Biden, John Pertwee, Johnny Depp, Lady Gaga, Mark Zuckerberg, Meryl Streep, Michael Jackson, Queen Elizabeth, Stan Hansen (50/50), Stan Lee, Will Smith, Wolfgang Amadeus Mozart.found by myselfNaruto UzumakiSasuke UchihaKakashi HatakePower RangerKim Jong-un2. 480+ Pony Diffusion XL Hats, Masks and More Props List - Booru Tags (SFW)by Viola_Aiarty at CivitaiThis post belongs to my series of Pony Diffusion XL Recognized Tokens lists. You can use the quick navigations below to access previous posts.for more detail go to the post or this one Access all the original image grids and wildcards here: https://mega.nz/folder/XcVVXbRL#uQPsHUfLeBnaNhSTmDgziQ3. How to train a logo lora for Fluxby JaneB at Civitaifrom this article, i made test on tensor.art lora training. you can play it herehttps://tensor.art/models/780240303475923311/Persib-logo-E9https://tensor.art/models/780138126203986771/Gojek-Logo-E44. Flux model training from just 1 image [Attention Masking]by mnemic at Civitaithis is article guide to train lora with single image and use masking, but no option for masking at tensor.art training, so if you train with transparant PNG background, it will failed.mnemic also have good article about captioning etc, so this is the bunch of his articlehttps://civitai.com/articles/7146/flux-style-captioning-differences-pt2-4-new-caption-tools-training-diaryhttps://civitai.com/articles/7044/font-model-training-with-flux-training-diary (for more detail about font, here https://civitai.com/user/juaner0211589/)https://civitai.com/articles/6868/flux-character-caption-differences-training-diaryhttps://civitai.com/articles/6792/flux-style-captioning-differences-training-diaryhttps://civitai.com/articles/2138/lora-datasets-training-data-list-civitai-dataset-guide5. Dont training lora with flux 1 dev.this is article is interesting, to train lora just used finetuned model instead the original from black forest lab.https://medium.com/@zhiwangshi28/why-flux-lora-so-hard-to-train-and-how-to-overcome-it-a0c70bc59eafi will update post soon. thanks
11
2
HOW TO CREATE LORA JUST UNDER 100 CREDIT (FLUX / SDXL / PONY / HUNYUAN DIT) BY EXPERIMENT BASED.

HOW TO CREATE LORA JUST UNDER 100 CREDIT (FLUX / SDXL / PONY / HUNYUAN DIT) BY EXPERIMENT BASED.

i will keep update here.
1
2
Quickstart Guide to Stable Video Diffusion

Quickstart Guide to Stable Video Diffusion

What is Stable Video Diffusion (SVD)?Stable Video Diffusion (SVD) from Stability AI, is an extremely powerful image-to-video model, which accepts an image input, into which it “injects” motion, producing some fantastic scenes.SVD is a latent diffusion model trained to generate short video clips from image inputs. There are two models. The first, img2vid, was trained to generate 14 frames of motion at a resolution of 576×1024, and the second, img2vid-xt is a finetune of the first, trained to generate 25 frames of motion at the same resolution.The newly released (2/2024) SVD 1.1 is further finetuned on a set of parameters to produce excellent, high-quality outputs, but requires specific settings, detailed below.Why should I be excited by SVD?SVD creates beautifully consistent video movement from our static images!How can I use SVD?ComfyUI is leading the pack when it comes to SVD image generation, with official SVD support! 25 frames of 1024×576 video uses < 10 GB VRAM to generate.It’s entirely possible to run the img2vid and img2vid-xt models on a GTX 1080 with 8GB of VRAM!There’s still no word (as of 11/28) on official SVD support in Automatic1111.If you’d like to try SVD on Google Colab, this workbook works on the Free Tier; https://github.com/sagiodev/stable-video-diffusion-img2vid/. Generation time varies, but is generally around 2 minutes on a V100 GPU.You’ll need to download one of the SVD models, from the links below, placing them in the ComfyUI/models/checkpoints directoryAfter updating your ComfyUI installation, you’ll see new nodes for VideoLinearCFGGuidance and SVD_img2vid _Conditioning. The Conditioning node takes the following inputs;You can download ComfyUI workflows for img2video and txt2video below, but keep in mind you’ll need to have an updated ComfyUI, and also may be missing additional nodes for Video. I recommend using the ComfyUI Manager to identify and download missing nodes!Suggested SettingsThe settings below are suggested settings for each SVD component (node), which I’ve found produce the most consistently useable outputs, with the img2vid and img2vid-xt models.Settings – Img2vid-xt-1.1February 2024 saw the release of a finetuned SVD model, version 1.1. This version only works with a very specific set of parameters to improve the consistency of outputs. If using the Img2vid-xt-1.1 model, the following settings must be applied to produce the best results;The easiest way to generate videosin tensor.art, you can generate videos very easily compared to the explanation above, all you need to do is input the prompt you want, select the model you like, set the ratio and set the frame in the animatediff menu.Output ExamplesLimitationsIt’s not perfect! Currently there are a few issues with the implementation, including;Generations are short! Only <=4 second generations are possible, at present.Sometimes there’s no motion in the outputs. We can tweak the conditioning parameters, but sometimes the images just refuse to move.The models cannot be controlled through text.Faces, and bodies in general, often aren’t the best!
4
6
How to use nodes

How to use nodes

There are a few ways to start editing within the comfUI. ComfUI is a drag and drop platform - which means you can drag images from outside of ComfUI or paste in text or images anywhere into the ComfUI canvasYou can also drag in nodes. The general idea of ComfUI is to connect nodes to one another to form workflows. To connect a node, simply drag an output from one node into another node’s input.Nodes are color coded by their type and can only be connected to other nodes that take their output as an input. A node’s outline will turn blue when you’re able to connect two nodes to one another.Additionally, some nodes can have more than one input and output. When this is the case, extra inputs and outputs are usually labeled with what they expect.To navigate the ComfUI canvas you can scroll or use your keyboard. Arrow keys will navigate you around the canvas while holding down command + arrow keys will toggle between different nodes.You can multi-select nodes and make batch edits such as dragging them around the canvas, deleting, or copying and pasting. You can also group nodes together to condense multiple nodes into a single group node.Tensor.art are constantly adding new nodes to ComfyUI. Here’s an exhaustive list of all the nodes that are currently available. Utility nodesBatch (images) provides a container for multiple images that can be processed as a batch. You can drag and drop images into a batch node. If you’re running Stable Diffusion, for example, and are outputting four images, you can send those images to the batch (images) node to see all four results. Batch nodes are also used as entry points and exit points for workflow templates - which we’ll cover in the workflow sectionBatch (text) provides a container for multiple pieces of text or documents that can be processed as a batch. You can drag and drop text snippets or text documents into a Batch node. Batch nodes are also used as entry points and exit points for workflow templates - which we’ll cover in the workflow sectionNotes allow you to annotate your canvas and do things like describe the functions of complex workflows. You can connect a single notes node to multiple other nodesRepeater will repeat the content (be it an image or text) of a previous node. Repeater nodes are useful for when you need to use the same input and send it to multiple other nodesSave to folder will save any data provided to it to the folder you specify on your computerSequencer iterates through a list of items (like images) at a fixed interval. However, instead of looping through the list one item at a time, the Sequencer node can send multiple items at each interval. The number of items is defined by the node's window, while the distance from the current window is defined by the node's strideShortcut allows you to incorporate a MacOS shortcut into your workflow. Size configures the width and height of an image. The size node will default to 512 x 512Timer fires an event at a configurable time intervalImage nodesAnimated Image uses a series of images to create videos or APNG and GIF imagesAspect ratio crops an image to the selected aspect ratio.Blend with mask uses the black regions of a mask to remove parts of an image. When provided with a background image, this node will use the black areas of an image mask to erase parts of the foreground image, which will let the background image shine through. You can combine a transparent foreground image (produced with the color node) with a background image to create a transparent cutout in the background image.Canny uses a canny edge-detection algorithm to show the edges of an image. Use the canny node in conjunction with the Stable Diffusion node to control which parts of an image Stable Diffusion draws into. The canny node works well for objects and structured poses, but it can also outline facial features such as wrinkles.Color creates an image from a color of your choice.Composite places two images on top of one another. Use the composite node to place a foreground image on top of a background image. This node is especially useful when foreground options have transparent regions.Crop transparent pixels will crop an image to the bounds of its opaque pixels. Depth map creates a grayscale image that represents the distance of objects in the original image to the camera. This node is useful as an input to the Stable Diffusion node.Desaturate adjusts an image’s saturation level based on a sliderDetect poses will estimate human poses that are present in an image. You can click and drag joints to change a poseDominant colors finds up to 12 dominant colors in an image and extracts themErase object lets you paint over an object to remove it from an imageFind faces will identify a face in an image and produce a black and white mask from the faceGradient creates a gradient from a series of colors. Linear and radial gradients are both optionsGaussian Blur adds a gaussian blur to an image with an adjustable blur radius.Holistic Edges uses holistically nested edge detection (HED) to draw edges in an image with softer, less crisp outlines. This is particularly useful with the Stable Diffusion nodeImage provides an empty image container. Drag an image file onto this node to fill it. Alternatively, use the node’s contextual menu (accessible via right or option click) to add a photo or sketch from your iPhone or iPadInvert reverses the colors of an imageMask gives you a free-hand brush or machine learning model to selectively mask out portions of an imageOpacity will change the opacity of an input imagePaint gives you a free-hand brush to paint over an input imageQR code generator generates a QR code from supplied text. Use the inspector to adjust the QR code’s size, color, and error-correction levelRemove background extract’s an image’s subject from its background. This node provides both the extracted image and a mask. Use an Invert on the mask and combine the original image with the inverted mask in a blend with mask node to create a transparent cutout in the shape of the image’s subject.Resize changes the width and height of an image. By default, this node uses width and height values of 512 pixels.Rotate rotates an image to a provided angleSquare aspect creates an image with a square aspect ratio by placing the supplied image on a transparent background with an equal width and height.Stable Diffusion (API) generates an image by using Stability AI’s DreamBooth API. To use this node, you will need to connect your API key from Stability AI. Image generation will incur a cost but images may generate faster than running the model locallyStable Diffusion generates an image by running Stable Diffusion on your Mac. Running locally will take longer but will not incur a cost for generating an image. This node also provides options for control the regions of an image into which Stable Diffusion is allowed to draw by leveraging ControlNetSuper resolution upscales the supplied image to a 2048 x 2048 resolution. General runs the image through ESRGAN, Fine Detail through Best Buddy GAN, Photo through 4x Ultrasharp, and Artwork through RemacriTrace edges draws the edges found in an image but, unlike other edge-detection nodes, retains the image’s color. Combine this node with a desaturation node to create an image for the Stable Diffusion node’s MLSD inputThreshold produces a black-and-white image by applying a threshold value that ranges between 0 and 1 to each pixel of the supplied image. The red, green and blue channels of the thresholded image will be 1 (i.e. white) if a pixel’s value is greater than the threshold and 0 (i.e. black) if the pixel’s value is smaller than the thresholdZoom Blur blurs an image using a zoom-blur kernel and adjustable power, detail, and focus-position values
8
Best settings for Stable Diffusion SDXL

Best settings for Stable Diffusion SDXL

The introduction of Stable Diffusion SDXL 1.0 by Stability marks a significant milestone. This article delves deep into the intricacies of this groundbreaking model, its architecture, and the optimal settings to harness its full potential.A successor to the Stable Diffusion 1.5 and 2.1, SDXL 1.0 boasts advancements that are unparalleled in image and facial composition. This capability allows it to craft descriptive images from simple and concise prompts and even generate words within images, setting a new benchmark for AI-generated visuals in 2023.SDXL 1.0: Technical architecture and how does it workThe architecture of SDXL has undergone some major upgrades. It employs a larger UNet backbone, which houses an increased number of attention blocks and an extended cross-attention context. This is made possible due to its second text encoder. The model operates on a mixture-of-experts pipeline for latent diffusion. Initially, the base model generates noisy latents, which are then refined in the subsequent denoising steps.The essence of the Stable Diffusion model lies in its unique approach to image generation. Unlike traditional methods that rely on labeled data, Stable Diffusion focuses on enabling models to learn the intricate details of images. This is achieved through a two-phase diffusion process:Forward Diffusion: Here, an image is taken and a controlled amount of random noise is introduced.Reverse Diffusion: The aim here is to denoise the image and reconstruct its original content.The U-Net plays a pivotal role in this process. It is trained to predict noise from a randomly noised image and calculate the loss between the predicted and actual noise. Over time, with a large dataset and multiple noise steps, the model becomes adept at making accurate predictions on noise patterns.So what's new in SDXL 1.0?With SDXL, an additional text encoder was introduced, which is trained against more linguistic prompts, and higher resolutions in comparison to the old one. The base model always uses both encoders, while the refiner has the option to run with only one of them or with both. Other improvements include:Enhanced U-Net Parameters: SDXL 1.0 has a larger number of U-Net parameters, enabling more intricate image generation.Heterogeneous Distribution of Transformer Blocks: Unlike its predecessors, SDXL 1.0 adopts a non-uniform distribution, paving the way for improved learning capabilities.Advanced Text Conditioning Encoders: With the inclusion of OpenCLIP ViT-bigG and an additional text encoder, CLIP ViT-L, SDXL 1.0 effectively integrates textual information into the image generation process.Innovative Conditioning Parameters: The introduction of "Size-Conditioning", "Crop-Conditioning", and "Multi-Aspect Conditioning" parameters allow the model to adapt its image generation based on various cues.Specialized Refiner Model: This model is adept at handling high-quality, high-resolution data, capturing intricate local details. The Refiner model is designed for the enhancement of low-noise stage images, resulting in high-frequency, superior-quality visuals. The Refiner checkpoint serves as a follow-up to the base checkpoint in the image quality improvement process.Overall, SDXL 1.0 outshines its predecessors and is a frontrunner among the current state-of-the-art image generators.Best Settings for SDXL 1.0: Guidance, Schedulers, and StepsTo harness the full potential of SDXL 1.0, it's crucial to understand its optimal settings:Guidance ScaleUnderstanding Classifier-Free Diffusion GuidanceDiffusion models are powerful tools for generating samples, but controlling their quality and diversity can be challenging. Traditionally, "classifier guidance" was used, which employs an external classifier to guide the sampling process, ensuring better sample quality. However, this method introduced complexity by necessitating an additional classifier's training. Enter "CLASSIFIER-FREE DIFFUSION GUIDANCE." This innovative approach uses a duo of diffusion models: a conditional one (tailored to specific conditions) and an unconditional one (for freeform generation). By merging the outputs of these two models, we strike a balance between sample quality and diversity, all without the need for an external classifier. This method is not only simpler, as it sidesteps the need for an extra classifier, but it also evades potential adversarial attacks associated with classifier guidance. The trade-off? It might be a tad slower since it involves two forward model passes.Choosing the Right Guidance WeightThe guidance weight is pivotal in determining the quality and alignment of generated images to the given prompt. Think of it as the dial controlling how closely the generated image adheres to your input. A value of 0 will yield random images, disregarding your prompt entirely. Opt for lower values if you're in the mood for more "creative" outputs, albeit with elements that might stray from your prompt. On the flip side, higher values produce images that mirror your prompt more accurately but might be less imaginative. For those using the SD model, a sweet spot lies between 5-15. Lean towards the lower end for creativity and the higher end for sharper, more precise images.StepsThis refers to the number of denoising steps. Diffusion models are iterative processes. They involve a repeated cycle that begins with random noise generated from a text input. As the process progresses, some of this noise is removed with each step, leading to a progressively higher-quality image.The "steps" parameter determines how many iterations or cycles the model will undergo. More denoising steps usually lead to a higher quality image at the expense of slower (and more expensive) inference. While a larger number of denoising steps enhance the output quality, it's essential to strike a balance.For SDXL, around 30 sampling steps are sufficient to achieve good-quality images. After a certain point, each step offers diminishing returns. Above 50, it may necessarily not produce images of better quality.As mentioned above, SDXL comes with two models. we have a 0.5 factor for the base vs refiner model, and hence the number of steps given as input will be divided equally between the two models. Refer to the high noise fraction section below for more info.High Noise Fraction: It defines how many steps and what % of steps are to be run on each expert (model), i.e. base and refiner model. We sets this at 0.5 which means 50% of the steps run on the base model and 50% run on the refiner model.SchedulersSchedulers in the context of Stable Diffusion are algorithms used alongside the UNet component of the Stable Diffusion pipeline. They play a pivotal role in the denoising process and operate multiple times iteratively (referred to as steps) to produce a clean image from an entirely random noisy one. The primary function of these scheduler algorithms is to progressively perturb data with increasing random noise (known as the “diffusion” process) and then sequentially eliminate noise to generate new data samples. Sometimes, they are also termed as Samplers.With SDXL 1.0, certain schedulers can generate a satisfactory image in as little as 20 steps. Among them, UniPC and Euler Ancestral are renowned for delivering the most distinct and rapid outcomes compared to their counterparts.Negative PromptsA negative prompt is a technique that allows users to specify what they don't want to see in the generated output, without providing any additional input. While negative prompts might not be as essential as the main prompts, they play a crucial role in preventing the generation of undesired or strange images. This approach ensures that the generated content aligns more closely with the user's intent by explicitly excluding unwanted elements.Examples of Commonly Used Negative Prompts:Basic Negative Prompts: worst quality, normal quality, low quality, low res, blurry, text, watermark, logo, banner, extra digits, cropped, jpeg artifacts, signature, username, error, sketch, duplicate, ugly, monochrome, horror, geometry, mutation, disgusting.For Animated Characters: bad anatomy, bad hands, three hands, three legs, bad arms, missing legs, missing arms, poorly drawn face, bad face, fused face, cloned face, worst face, three crus, extra crus, fused crus, worst feet, three feet, fused feet, fused thigh, three thigh, fused thigh, extra thigh, worst thigh, missing fingers, extra fingers, ugly fingers, long fingers, horn, realistic photo, extra eyes, huge eyes, 2girl, amputation, disconnected limbs.For Realistic Characters: bad anatomy, bad hands, three hands, three legs, bad arms, missing legs, missing arms, poorly drawn face, bad face, fused face, cloned face, worst face, three crus, extra crus, fused crus, worst feet, three feet, fused feet, fused thigh, three thigh, fused thigh, extra thigh, worst thigh, missing fingers, extra fingers, ugly fingers, long fingers, horn, extra eyes, huge eyes, 2girl, amputation, disconnected limbs, cartoon, cg, 3d, unreal, animate.For Non-Adult Content: nsfw, nude, censored.
4
100 hollywood actors and actresses

100 hollywood actors and actresses

Actors Leonardo DiCaprioBrad PittTom CruiseRobert Downey Jr.Johnny DeppDwayne JohnsonWill SmithChris HemsworthChris EvansHugh JackmanKeanu ReevesRyan ReynoldsMatt DamonGeorge ClooneyMorgan FreemanTom HanksSamuel L. JacksonMark WahlbergChristian BaleJake GyllenhaalJoaquin PhoenixAdam DriverBen AffleckRyan GoslingDaniel CraigJason MomoaChris PrattVin DieselMichael B. JordanRobert PattinsonTimothée ChalametEddie RedmayneJared LetoIdris ElbaBenedict CumberbatchJeremy RennerPaul RuddMark RuffaloJohn KrasinskiBradley CooperChanning TatumZac EfronAndrew GarfieldTobey MaguireColin FarrellEwan McGregorJamie FoxxOrlando BloomShia LaBeoufJames McAvoyMatt BomerAlexander SkarsgårdBill SkarsgårdJosh BrolinViggo MortensenLiam NeesonTom HardyJason StathamHenry CavillPatrick DempseyJon HammMichael FassbenderRussell CroweJude LawJeff BridgesSean PennAdrien BrodyChristoph WaltzMatthew McConaugheyEthan HawkeHarrison FordAl PacinoRobert De NiroSylvester StalloneArnold SchwarzeneggerMel GibsonBruce WillisRichard GereClint EastwoodKevin CostnerDon CheadleForest WhitakerKevin SpaceyJohn TravoltaWillem DafoeViggo MortensenBilly Bob ThorntonJeff GoldblumPierce BrosnanNicolas CageCuba Gooding Jr.Ben StillerOwen WilsonVince VaughnSeth RogenJonah HillSteve CarellJack BlackSimon PeggHugh GrantActressesMeryl StreepScarlett JohanssonJennifer LawrenceEmma StoneAngelina JolieCharlize TheronNatalie PortmanAnne HathawaySandra BullockJulia RobertsNicole KidmanCate BlanchettMargot RobbieGal GadotBrie LarsonAmy AdamsJessica ChastainEmily BluntLupita Nyong'oZendayaKristen StewartDakota JohnsonJennifer AnistonCourteney CoxKaley CuocoEmilia ClarkeSophie TurnerMaisie WilliamsMillie Bobby BrownWinona RyderKate WinsletKeira KnightleyRachel McAdamsMichelle WilliamsHalle BerrySalma HayekPenélope CruzEva GreenRosamund PikeNaomi WattsSaoirse RonanFlorence PughAnya Taylor-JoyTessa ThompsonAlison BrieElizabeth OlsenKristen BellLily CollinsChloe Grace MoretzReese WitherspoonNicole KidmanHelen MirrenJodie FosterCate BlanchettJulianne MooreTilda SwintonSigourney WeaverHilary SwankJane FondaSharon StoneSusan SarandonDiane KeatonRenée ZellwegerMarisa TomeiCameron DiazDemi MooreKim BasingerSandra OhLucy LiuTaraji P. HensonRegina KingOctavia SpencerViola DavisLaura DernAllison JanneyKerry WashingtonRashida JonesTina FeyAmy PoehlerJane KrakowskiAnna KendrickRebel WilsonIsla FisherRose ByrneEmma ThompsonHelena Bonham CarterThandiwe NewtonOlivia ColmanMelissa McCarthyKirsten DunstMegan FoxElizabeth BanksEmily MortimerRachel WeiszFamke JanssenMonica BellucciCarla GuginoMila KunisKristen WiigChristina Applegate
100 PROMPT COLLECTION OF CLOTHES AND OUTFIT

100 PROMPT COLLECTION OF CLOTHES AND OUTFIT

OUTFIT COLLECTION 1. Casual WearBlue denim jeans with a white T-shirtOversized sweatshirt with black leggingsPlaid flannel shirt with ripped jeansGraphic tee with denim shortsLightweight hoodie with jogger pantsV-neck T-shirt with khaki shortsCrop top with high-waisted jeansStriped long-sleeve shirt with skinny jeansDenim jacket over a casual dressPolo shirt with cargo pants2. Formal WearBlack tailored suit with a white dress shirtNavy blazer with matching trousersEvening gown with sequin detailsCocktail dress with lace overlayCrisp white shirt with a pencil skirtTuxedo with a bow tieA-line dress with pearl necklaceDouble-breasted blazer with tailored pantsFloor-length satin gownClassic trench coat over a sheath dress3. SportswearBreathable tank top with running shortsSports bra with high-waisted leggingsMoisture-wicking T-shirt with track pantsCompression shirt with basketball shortsZip-up athletic jacket with capri leggingsMesh workout top with biker shortsSleeveless hoodie with jogger sweatpantsLong-sleeve performance shirt with tennis skirtQuarter-zip pullover with gym shortsRacerback tank with yoga pants4. Traditional WearSilk kimono with intricate embroideryVibrant sari with golden bordersTraditional kebaya with batik sarongScottish kilt with sporran and hoseHanbok with floral patternsDashiki with matching trousersBavarian dirndl with apronNative American ceremonial dressAfrican boubou with headwrapMexican charro suit5. StreetwearOversized graphic hoodie with baggy jeansBomber jacket with ripped skinny jeansSnapback cap with cargo pantsTie-dye T-shirt with distressed denimCamouflage jacket with joggersStreetwear brand logo tee with sweatpantsDenim vest with biker shortsLongline T-shirt with track pantsHigh-top sneakers with ripped shortsFlannel shirt tied around the waist with ripped jeans6. Fantasy/Costume WearElven archer costume with leather armorMedieval knight armor with shieldSorceress robe with mystical staffPirate outfit with tricorn hatFairy dress with wingsSteampunk adventurer ensembleVampire cloak with fangsSuperhero suit with mask and capeAlien costume with futuristic helmetWitch outfit with pointed hat7. Summer WearFloral sundress with straw hatBikini with matching sarongLinen shorts with tank topOff-shoulder top with denim shortsSleeveless romper with sandalsBeach cover-up with flip-flopsCrop top with flowy skirtOne-piece swimsuit with wide-brim hatBoard shorts with Hawaiian shirtLightweight maxi dress with espadrilles8. Winter WearWool coat with scarf and glovesPuffer jacket with beanieTurtleneck sweater with corduroy pantsFaux fur coat with leather bootsKnit cardigan with thermal leggingsParka with faux fur trimCashmere sweater with wool trousersQuilted vest with flannel shirtSki jacket with snow pantsHeavy knit sweater with infinity scarf9. Business WearPinstripe suit with a silk tieBlazer with tailored skirtButton-down shirt with dress pantsPencil dress with a fitted blazerClassic trench coat over business attireVest with matching trousersSheath dress with statement necklaceDouble-breasted suit with cufflinksCardigan with blouse and slacksPeplum top with pencil skirt10. Party WearSequined mini dress with stiletto heelsVelvet blazer with skinny jeansOff-the-shoulder cocktail dressMetallic skirt with a crop topSatin slip dress with ankle bootsHalter top with leather pantsLace dress with platform heelsBeaded dress with fringe detailsOne-shoulder jumpsuit with statement earringsBodycon dress with glitter accentsCLOTHES COLLECTION1. TopsWhite cotton T-shirtBlack silk blouseRed plaid flannel shirtNavy blue polo shirtGreen V-neck sweaterYellow crop topBeige turtleneck sweaterPurple tank topGrey graphic hoodiePink off-shoulder blouse2. BottomsBlue denim jeansBlack leather skirtGrey sweatpantsKhaki chinosWhite linen shortsRed pencil skirtGreen cargo pantsNavy blue leggingsBrown corduroy pantsPurple A-line skirt3. OuterwearBlack leather jacketGrey wool coatRed trench coatGreen parka with faux fur trimBlue denim jacketBeige bomber jacketNavy pea coatBrown suede jacketWhite puffer jacketYellow raincoat4. DressesBlack little black dress (LBD)Red cocktail dressBlue maxi dressGreen wrap dressWhite sundressPurple evening gownPink shift dressYellow halter dressOrange sheath dressGrey bodycon dress5. FootwearBlack leather bootsWhite sneakersBrown loafersRed high heelsBlue running shoesGreen flip-flopsBeige ballet flatsGrey ankle bootsPurple sandalsYellow rain boots6. AccessoriesBlack leather beltSilver hoop earringsGold wristwatchRed silk scarfBlue baseball capGreen wool beanieWhite sunglassesBrown leather glovesPurple statement necklaceYellow straw hat7. SportswearBlack sports braWhite running shortsGrey yoga pantsBlue moisture-wicking T-shirtRed track jacketGreen tennis skirtPurple compression leggingsYellow athletic tank topPink zip-up hoodieOrange basketball shorts8. LoungewearGrey sweatpantsWhite oversized T-shirtBlack lounge shortsBlue hoodieRed fleece pajama pantsGreen knit cardiganPurple bathrobeBeige slippersYellow cotton pajama setPink tank top and shorts set9. SwimwearRed bikiniBlue one-piece swimsuitBlack swim trunksWhite rash guardGreen board shortsYellow tankiniPink swim dressOrange swim shortsPurple high-waisted bikiniGrey monokini10. FormalwearBlack tuxedoWhite dress shirtNavy blue blazerGrey dress pantsRed tieGreen evening gownBlue cocktail dressPurple bow tieBeige dress shoesSilver cufflinks
Stylistic QR Code with Stable Diffusion

Stylistic QR Code with Stable Diffusion

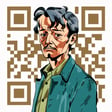
source: anfu.me (now you can easyly create QRcode with tensor.art inside controlnet, next time i will create guide about that)Yesterday, I created this image using Stable Diffusion and ControlNet, and shared on Twitter and Instagram – an illustration that also functions as a scannable QR code.The process of creating it was super fun, and I’m quite satisfied with the outcome.In this post, I would like to share some insights into my learning journey and the approaches I adopted to create this image. Additionally, I want to take this opportunity to credit the remarkable tools and models that made this project possible.Get into the Stable DiffusionThis year has witnessed an explosion of mind-boggling AI technologies, such as ChatGPT, DALL-E, Midjourney, Stable Diffusion, and many more. As a former photographer also with some interest in design and art, being able to generate images directly from imagination in minutes is undeniably tempting.So I started by trying Midjourney, it’s super easy to use, very expressive, and the quality is actually pretty good. It would honestly be my recommendation for anyone who wants to get started with generative AI art.By the way, Inès has also delved into it and become quite good at it now, go check her work on her new Instagram account  @a.i.nes.On my end, being a programmer with strong preferences, I would naturally seek for greater control over the process. This brought me to the realm of Stable Diffusion. I started with this guide: Stable Diffusion LoRA Models: A Complete Guide. The benefit of being late to the party is that there are already a lot of tools and guides ready to use. Setting up the environment quite straightforward and luckily my M1 Max’s GPU is supported.QR Code ImageA few weeks ago, nhciao on reddit posted a series of artistic QR codes created using Stable Diffusion and ControlNet. The concept behind them fascinated me, and I defintely want to make one for my own. So I did some research and managed to find the original article in Chinese: Use AI to Generate Scannable Images. The author provided insights into their motivations and the process of training the model, although they did not release the model itself. On the other hand, they are building a service called QRBTF.AI to generate such QR code, however it is not yet available.Until another day I found an community model QR Pattern Controlnet Model on CivitAI. I know I got to give it a try!SetupMy goal was to generate a QR code image that directs to my website while elements that reflect my interests. I ended up taking a slightly cypherpunk style with a character representing myself :PDisclaimer: I’m certainly far from being an expert in AI or related fields. In this post, I’m simply sharing what I’ve learned and the process I followed. My understanding may not be entirely accurate, and there are likely optimizations that could simplify the process. If you have any suggestions or comments, please feel free to reach out using the links at the bottom of the page. Thank you!1. Setup EnvironmentI pretty much follows Stable Diffusion LoRA Models: A Complete Guide to install the web ui AUTOMATIC1111/stable-diffusion-webui, download models you are interested in from CivitAI, etc. As a side note, I found that the user experience of the web ui is not super friendly, some of them I guess are a bit architectural issues that might not be easy to improve, but luckily I found a pretty nice theme canisminor1990/sd-webui-kitchen-theme that improves a bunch of small things.In order to use ControlNet, you will also need to install the Mikubill/sd-webui-controlnet extension for the web ui.Then you can download the QR Pattern Controlnet Model, putt the two files (.safetensors and .yaml) under stable-diffusion-webui/models/ControlNet folder, and restart the web ui.2. Create a QR CodeThere are hundreds of QR Code generators full of adds or paid services, and we certainly don’t need those fanciness – because we are going to make it much more fancier 😝!So I end up found the QR Code Generator Library, a playground of an open source QR Code generator. It’s simple but exactly what I need! It’s better to use medium error correction level or above to make it more easy recognizable later. Small tip that you can try with different Mask pattern to find a better color destribution that fits your design.3. Text to ImageAs the regular Text2Image workflow, we need to provide some prompts for the AI to generate the image from. Here is the prompts I used:Prompts(one male engineer), medium curly hair, from side, (mechanics), circuit board, steampunk, machine, studio, table, science fiction, high contrast, high key, cinematic light, (masterpiece, top quality, best quality, official art, beautiful and aesthetic:1.3), extreme detailed, highest detailed, (ultra-detailed)Negative Prompts(worst quality, low quality:2), overexposure, watermark, text, easynegative, ugly, (blurry:2), bad_prompt,bad-artist, bad hand, ng_deepnegative_v1_75tThen we need to go the ControlNet section, and upload the QR code image we generated earlier. And configure the parameters as suggested in the model homepage.Then you can start to generate a few images and see if it met your expectations. You will also need to check if the generated image is scannable, if not, you can tweak the Start controling step and End controling step to find a good balance between stylization and QRCode-likeness.4. I’m feeling lucky!After finding a set of parameters that I am happy with, I will increase the Batch Count to around 100 and let the model generate variations randomly. Later I can go through them and pick one with the best conposition and details for further refinement. This can take a lot of time, and also a lot of resources from your processors. So I usually start it before going to bed and leave it overnight.Here are some examples of the generated variations (not all of them are scannable):From approximately one hundred variations, I ultimately chose the following image as the starting point:It gets pretty interesting composition, while being less obvious as a QR code. So I decided to proceed with it and add add a bit more details. (You can compare it with the final result to see the changes I made.)5. Refining DetailsUpdate: I recently built a toolkit to help with this process, check my new blog post 👉 Refine AI Generated QR Code for more details.The generated images from the model are not perfect in every detail. For instance, you may have noticed that the hand and face appear slightly distorted, and the three anchor boxes in the corner are less visually appealing. We can use the inpaint feature to tell the model to redraw some parts of the image (it would better if you keep the same or similiar prompts as the original generation).Inpainting typically requires a similar amount of time as generating a text-to-image, and it involves either luck or patience. Often, I utilize Photoshop to "borrow" some parts from previously generated images and utilize the spot healing brush tool to clean up glitches and artifacts. My Photoshop layers would looks like this:After making these adjustments, I’ll send the combined image back for inpainting again to ensure a more seamless blend. Or to search for some other components that I didn’t found in other images.Specifically on the QR Code, in some cases ControlNet may not have enough prioritize, causing the prompts to take over and result in certain parts of the QR Code not matching. To address this, I would overlay the original QR Code image onto the generated image (as shown in the left image below), identify any mismatches, and use a brush tool to paint those parts with the correct colors (as shown in the right image below).I then export the marked image for inpainting once again, adjusting the Denoising strength to approximately 0.7. This would ensures that the model overrides our marks while still respecting the color to some degree.Ultimately, I iterate through this process multiple times until I am satisfied with every detail.6. UpscalingThe recommended generation size is 920x920 pixels. However, the model does not always generate highly detailed results at the pixel level. As a result, details like the face and hands can appear blurry when they are too small. To overcome this, we can upscale the image, providing the model with more pixels to work with. The SD Upscaler script in the img2img tab is particularly effective for this purpose. You can refer to the guide Upscale Images With Stable Diffusion for more information.7. Post-processingLastly, I use Photoshop and Lightroom for subtle color grading and post-processing, and we are done!The one I end up with not very good error tolerance, you might need to try a few times or use a more forgiving scanner to get it scanned :PAnd using the similarly process, I made another one for Inès:ConclusionCreating this image took me a full day, with a total of 10 hours of learning, generating, and refining. The process was incredibly enjoyable for me, and I am thrilled with the end result! I hope this post can offer you some fundamental concepts or inspire you to embark on your own creative journey. There is undoubtedly much more to explore in this field, and I eager to see what’s coming next!Join my Discord Server and let’s explore more together!If you want to learn more about the refining process, go check my new blog post: Refining AI Generated QR Code.ReferencesHere are the list of resources for easier reference.ConceptsStable DiffusionControlNetToolsHardwares & Softwares I am using.AUTOMATIC1111/stable-diffusion-webui - Web UI for Stable Diffusioncanisminor1990/sd-webui-kitchen-theme - Nice UI enhancementMikubill/sd-webui-controlnet - ControlNet extension for the webuiQR Code Generator Library - QR code generator that is ad-free and customisableAdobe Photoshop - The tool I used to blend the QR code and the illustrationModelsControl Net Models for QR Code (you can pick one of them)QR Pattern Controlnet ModelControlnet QR Code MonsterIoC Lab Control NetCheckpoint Model (you can use any checkpoints you like)Ghostmix Checkpoint - A very high quality checkpoint I use. You can use any other checkpoints you likeTutorialsStable Diffusion LoRA Models: A Complete Guide - The one I used to get started(Chinese) Use AI to genereate scannable images - Unfortunately the article is in Chinese and I didn’t find a English version of it.Upscale Images With Stable Diffusion - Enlarge the image while adding more details
1
[Guide] Make your own Loras, easy and free

[Guide] Make your own Loras, easy and free

This article helped me to create my first Lora and upload it to Tensor.art, although Tensor.art has its own Lora Train , this article helps to understand how to create Lora well.🏭 PreambleEven if you don't know where to start or don't have a powerful computer, I can guide you to making your first Lora and more!In this guide we'll be using resources from my GitHub page. If you're new to Stable Diffusion I also have a full guide to generate your own images and learn useful tools.I'm making this guide for the joy it brings me to share my hobbies and the work I put into them. I believe all information should be free for everyone, including image generation software. However I do not support you if you want to use AI to trick people, scam people, or break the law. I just do it for fun.Also here's a page where I collect Hololive loras.📃What you needAn internet connection. You can even do this from your phone if you want to (as long as you can prevent the tab from closing).Knowledge about what Loras are and how to use them.Patience. I'll try to explain these new concepts in an easy way. Just try to read carefully, use critical thinking, and don't give up if you encounter errors.🎴Making a Lorat has a reputation for being difficult. So many options and nobody explains what any of them do. Well, I've streamlined the process such that anyone can make their own Lora starting from nothing in under an hour. All while keeping some advanced settings you can use later on.You could of course train a Lora in your own computer, granted that you have an Nvidia graphics card with 6 GB of VRAM or more. We won't be doing that in this guide though, we'll be using Google Colab, which lets you borrow Google's powerful computers and graphics cards for free for a few hours a day (some say it's 20 hours a week). You can also pay $10 to get up to 50 extra hours, but you don't have to. We'll also be using a little bit of Google Drive storage.This guide focuses on anime, but it also works for photorealism. However I won't help you if you want to copy real people's faces without their consent.🎡 Types of LoraAs you may know, a Lora can be trained and used for:A character or personAn artstyleA poseA piece of clothingetcHowever there are also different types of Lora now:LoRA: The classic, works well for most cases.LoCon: Has more layers which learn more aspects of the training data. Very good for artstyles.LoHa, LoKR, (IA)^3: These use novel mathematical algorithms to process the training data. I won't cover them as I don't think they're very useful.📊 First Half: Making a DatasetThis is the longest and most important part of making a Lora. A dataset is (for us) a collection of images and their descriptions, where each pair has the same filename (eg. "1.png" and "1.txt"), and they all have something in common which you want the AI to learn. The quality of your dataset is essential: You want your images to have at least 2 examples of: poses, angles, backgrounds, clothes, etc. If all your images are face close-ups for example, your Lora will have a hard time generating full body shots (but it's still possible!), unless you add a couple examples of those. As you add more variety, the concept will be better understood, allowing the AI to create new things that weren't in the training data. For example a character may then be generated in new poses and in different clothes. You can train a mediocre Lora with a bare minimum of 5 images, but I recommend 20 or more, and up to 1000.As for the descriptions, for general images you want short and detailed sentences such as "full body photograph of a woman with blonde hair sitting on a chair". For anime you'll need to use booru tags (1girl, blonde hair, full body, on chair, etc.). Let me describe how tags work in your dataset: You need to be detailed, as the Lora will reference what's going on by using the base model you use for training. If there is something in all your images that you don't include in your tags, it will become part of your Lora. This is because the Lora absorbs details that can't be described easily with words, such as faces and accessories. Thanks to this you can let those details be absorbed into an activation tag, which is a unique word or phrase that goes at the start of every text file, and which makes your Lora easy to prompt.You may gather your images online, and describe them manually. But fortunately, you can do most of this process automatically using my new 📊 dataset maker colab.Here are the steps:1️⃣ Setup: This will connect to your Google Drive. Choose a simple name for your project, and a folder structure you like, then run the cell by clicking the floating play button to the left side. It will ask for permission, accept to continue the guide.If you already have images to train with, upload them to your Google Drive's "lora_training/datasets/project_name" (old) or "Loras/project_name/dataset" (new) folder, and you may choose to skip step 2.2️⃣ Scrape images from Gelbooru: In the case of anime, we will use the vast collection of available art to train our Lora. Gelbooru sorts images through thousands of booru tags describing everything about an image, which is also how we'll tag our images later. Follow the instructions on the colab for this step; basically, you want to request images that contain specific tags that represent your concept, character or style. When you run this cell it will show you the results and ask if you want to continue. Once you're satisfied, type yes and wait a minute for your images to download.3️⃣ Curate your images: There are a lot of duplicate images on Gelbooru, so we'll be using the FiftyOne AI to detect them and mark them for deletion. This will take a couple minutes once you run this cell. They won't be deleted yet though: eventually an interactive area will appear below the cell, displaying all your images in a grid. Here you can select the ones you don't like and mark them for deletion too. Follow the instructions in the colab. It is beneficial to delete low quality or unrelated images that slipped their way in. When you're finished, send Enter in the text box above the interactive area to apply your changes.4️⃣ Tag your images: We'll be using the WD 1.4 tagger AI to assign anime tags that describe your images, or the BLIP AI to create captions for photorealistic/other images. This takes a few minutes. I've found good results with a tagging threshold of 0.35 to 0.5. After running this cell it'll show you the most common tags in your dataset which will be useful for the next step.5️⃣ Curate your tags: This step for anime tags is optional, but very useful. Here you can assign the activation tag (also called trigger word) for your Lora. If you're training a style, you probably don't want any activation tag so that the Lora is always in effect. If you're training a character, I myself tend to delete (prune) common tags that are intrinsic to the character, such as body features and hair/eye color. This causes them to get absorbed by the activation tag. Pruning makes prompting with your Lora easier, but also less flexible. Some people like to prune all clothing to have a single tag that defines a character outfit; I do not recommend this, as too much pruning will affect some details. A more flexible approach is to merge tags, for example if we have some redundant tags like "striped shirt, vertical stripes, vertical-striped shirt" we can replace all of them with just "striped shirt". You can run this step as many times as you want.6️⃣ Ready: Your dataset is stored in your Google Drive. You can do anything you want with it, but we'll be going straight to the second half of this tutorial to start training your Lora!⭐ Second Half: Settings and TrainingThis is the tricky part. To train your Lora we'll use my ⭐ Lora trainer colab. It consists of a single cell with all the settings you need. Many of these settings don't need to be changed. However, this guide and the colab will explain what each of them do, such that you can play with them in the future.Here are the settings:▶️ Setup: Enter the same project name you used in the first half of the guide and it'll work automatically. Here you can also change the base model for training. There are 2 recommended default ones, but alternatively you can copy a direct download link to a custom model of your choice. Make sure to pick the same folder structure you used in the dataset maker.▶️ Processing: Here are the settings that change how your dataset will be processed.The resolution should stay at 512 this time, which is normal for Stable Diffusion. Increasing it makes training much slower, but it does help with finer details.flip_aug is a trick to learn more evenly, as if you had more images, but makes the AI confuse left and right, so it's your choice.shuffle_tags should always stay active if you use anime tags, as it makes prompting more flexible and reduces bias.activation_tags is important, set it to 1 if you added one during the dataset part of the guide. This is also called keep_tokens.▶️ Steps: We need to pay attention here. There are 4 variables at play: your number of images, the number of repeats, the number of epochs, and the batch size. These result in your total steps.You can choose to set the total epochs or the total steps, we will look at some examples in a moment. Too few steps will undercook the Lora and make it useless, and too many will overcook it and distort your images. This is why we choose to save the Lora every few epochs, so we can compare and decide later. For this reason, I recommend few repeats and many epochs.There are many ways to train a Lora. The method I personally follow focuses on balancing the epochs, such that I can choose between 10 and 20 epochs depending on if I want a fast cook or a slow simmer (which is better for styles). Also, I have found that more images generally need more steps to stabilize. Thanks to the new min_snr_gamma option, Loras take less epochs to train. Here are some healthy values for you to try:10 images × 10 repeats × 20 epochs ÷ 2 batch size = 1000 steps20 images × 10 repeats × 10 epochs ÷ 2 batch size = 1000 steps100 images × 3 repeats × 10 epochs ÷ 2 batch size = 1500 steps400 images × 1 repeat × 10 epochs ÷ 2 batch size = 2000 steps1000 images × 1 repeat × 10 epochs ÷ 3 batch size = 3300 steps▶️ Learning: The most important settings. However, you don't need to change any of these your first time. In any case:The unet learning rate dictates how fast your Lora will absorb information. Like with steps, if it's too small the Lora won't do anything, and if it's too large the Lora will deepfry every image you generate. There's a flexible range of working values, specially since you can change the intensity of the lora in prompts. Assuming you set dim between 8 and 32 (see below), I recommend 5e-4 unet for almost all situations. If you want a slow simmer, 1e-4 or 2e-4 will be better. Note that these are in scientific notation: 1e-4 = 0.0001The text encoder learning rate is less important, specially for styles. It helps learn tags better, but it'll still learn them without it. It is generally accepted that it should be either half or a fifth of the unet, good values include 1e-4 or 5e-5. Use google as a calculator if you find these small values confusing.The scheduler guides the learning rate over time. This is not critical, but still helps. I always use cosine with 3 restarts, which I personally feel like it keeps the Lora "fresh". Feel free to experiment with cosine, constant, and constant with warmup. Can't go wrong with those. There's also the warmup ratio which should help the training start efficiently, and the default of 5% works well.▶️ Structure: Here is where you choose the type of Lora from the 2 I mentioned in the beginning. Also, the dim/alpha mean the size of your Lora. Larger does not usually mean better. I personally use 16/8 which works great for characters and is only 18 MB.▶️ Ready: Now you're ready to run this big cell which will train your Lora. It will take 5 minutes to boot up, after which it starts performing the training steps. In total it should be less than an hour, and it will put the results in your Google Drive.🏁 Third Half: TestingYou read that right. I lied! 😈 There are 3 parts to this guide.When you finish your Lora you still have to test it to know if it's good. Go to your Google Drive inside the /lora_training/outputs/ folder, and download everything inside your project name's folder. Each of these is a different Lora saved at different epochs of your training. Each of them has a number like 01, 02, 03, etc.Here's a simple workflow to find the optimal way to use your Lora:Put your final Lora in your prompt with a weight of 0.7 or 1, and include some of the most common tags you saw during the tagging part of the guide. You should see a clear effect, hopefully similar to what you tried to train. Adjust your prompt until you're either satisfied or can't seem to get it any better.Use the X/Y/Z plot to compare different epochs. This is a builtin feature in webui. Go to the bottom of the generation parameters and select the script. Put the Lora of the first epoch in your prompt (like "<lora:projectname-01:0.7>"), and on the script's X value write something like "-01, -02, -03", etc. Make sure the X value is in "Prompt S/R" mode. These will perform replacements in your prompt, causing it to go through the different numbers of your lora so you can compare their quality. You can first compare every 2nd or every 5th epoch if you want to save time. You should ideally do batches of images to compare more fairly.Once you've found your favorite epoch, try to find the best weight. Do an X/Y/Z plot again, this time with an X value like ":0.5, :0.6, :0.7, :0.8, :0.9, :1". It will replace a small part of your prompt to go over different lora weights. Again it's better to compare in batches. You're looking for a weight that results in the best detail but without distorting the image. If you want you can do steps 2 and 3 together as X/Y, it'll take longer but be more thorough.If you found results you liked, congratulations! Keep testing different situations, angles, clothes, etc, to see if your Lora can be creative and do things that weren't in the training data.source: civitai/holostrawberry
39
7
Here are three interesting facts about Stable Diffusion 3, the latest open-source AI model

Here are three interesting facts about Stable Diffusion 3, the latest open-source AI model

1. Stable Diffusion 3 Uses a New ArchitectureAccording to Stability AI, Stable Diffusion 3 features a different architecture compared to its predecessors like Stable Diffusion 2.1 and SDXL. This new model adopts what is known as the diffusion transformer architecture. This architecture is claimed to enhance the efficiency and quality of the generated images.Stable Diffusion 3 also utilizes techniques such as flow matching and Continuous Normalizing Flows (CNFs). Simply put, these techniques enable Stable Diffusion 3 to produce more beautiful images with more efficient computational power. This model is expected to be more reliable for various user applications.2. Stable Diffusion 3 Comes in Various SizesTo meet the diverse needs of users, Stable Diffusion 3 is available in various models with different sizes, ranging from 800 million to 8 billion parameters. This size variation offers flexibility, allowing each user to find the model that best suits their needs.For those prioritizing superior image quality, a model with more parameters might be the choice, although it requires more computational resources. Conversely, for users who prioritize computational efficiency, a model with fewer parameters provides an effective solution without sacrificing too much quality. Thus, Stable Diffusion 3 opens up new opportunities for creative exploration without being limited by device capacity.3. Stable Diffusion 3 is Better at Understanding PromptsAnother improvement in Stable Diffusion 3 is its enhanced ability to understand more complex prompts. Stable Diffusion 3 can handle intricate scenarios containing multiple subjects. This allows users to be more creative in realizing their imagination.Stable Diffusion 3 also offers significantly better typography capabilities. This is a significant improvement addressing the weaknesses of the previous models. Now, this model can add text to images more accurately and consistently. The text generation ability of Stable Diffusion 3 is also considered comparable to its competitors, such as DALL-E.Stable Diffusion 3 arrives as a breath of fresh air amidst the heated competition among AI companies. This model marks a significant leap in the development of open-source models to support AI democratization and curb the excessive dominance of major players. With these various improvements in Stable Diffusion 3, are you interested in trying it out?
1
Creating LoRA for AI Art: 4 Essential Preparations

Creating LoRA for AI Art: 4 Essential Preparations

LoRA (Low-Rank Adaptation) is an add-on commonly used by AI Arts users to refine artworks generated from Stable Diffusion Model Checkpoints according to their preferences.This small additional model can apply impressive changes to standard Model CheckPoints with relatively good quality, depending on its processing.LoRA models typically have a capacity between 10 – 200 MB, which is significantly smaller than checkpoint files that exceed 1 GB.However, it's important to note that various factors contribute to the varying sizes of LoRA, such as its settings/parameters. Nonetheless, LoRA generally has a smaller capacity than Model Checkpoints.Given its relatively small size, LoRA makes it easier for users to upload, download, and combine it with the checkpoint models they use, enriching the AI Arts results with backgrounds, characters, and styles according to the user's desires.It's important to note that LoRA cannot be used independently. It requires a checkpoint model to be functional. So, how do you create a LoRA? What do you need to prepare to make a LoRA?To create a LoRA, you need to prepare the following:Datasets Before creating a LoRA, ensure you have datasets that will be trained/used to create the LoRA. If you don't have one, you must prepare it first.There is no set rule for the quantity. Too many datasets don't necessarily yield a good LoRA, and too few may not either. Ensure to prepare high-quality datasets with various angles, poses, expressions, positions, and others. Align it with your goal in creating the LoRA, whether it's for style, creating fictional/realistic characters, or other purposes.Often, users process their datasets first before training them to become LoRA. This process includes cropping to ensure all datasets are the same size and adjusting the image resolution for better quality and clarity. If the datasets are blurry, the LoRA might produce poor and blurry quality.Understanding LoRA Parameters and Settings Understanding LoRA parameters and settings is not easy, but you can learn it gradually over time if you are determined to study it. This is necessary knowledge that you must have.There might not be many articles in Indonesian discussing LoRA, so to learn more, you may need to dive deeper into various English or other language sites that cover the topic, join the community, and learn what they are learning too.A commonly used formula for LoRA is "Datasets x num_repeats x epoch / train_batch_size = steps", which calculates the number of steps for LoRA and sets the steps for each epoch.Example: Datasets (40 images) x 10 (num_repeats) x 10 epochs / 4 (train batch size) results in 1000 steps for the 10th epoch of LoRA. Steps for the first epoch are 100 steps, the second epoch: 200 steps, and so on until the 10th epoch, which has 1000 steps.This formula is not the only thing you need to know. You also need to learn about network_dim, network_alpha, learning_rate, and many others.PC/Colab The most crucial and primary thing you need to have is a PC with Stable Diffusion or Kohya Trainer installed locally. However, this requires a high-spec computer, including a powerful processor, RAM, high VRAM GPU, and others. If you don't have one, an alternative is to train LoRA using Google Colab.Luckily, now you can easily train Lora in tensor.art, by logging in to your account, clicking on profile then selecting train Lora, or you can click here to go directly to the train lora pageLocal/Cloud Storage Media Make sure you have storage media to save your datasets and LoRA. You can upload these datasets and LoRA to popular cloud storage services like Google Drive, Mega, MediaFire, etc., so if your files are lost from your computer, you still have a backup.You can also upload them to platforms like HuggingFace, Civitai, and others. This will make it easier for you to use them through Google Colab.
8
1
Artist Inspired Styles for Stable Diffusion and Their Examples

Artist Inspired Styles for Stable Diffusion and Their Examples

Stable Diffusion is a powerful AI model that can generate images based on text prompts. One of its exciting features is the ability to create images in the style of various renowned artists. This allows users to explore and create artwork inspired by the distinctive techniques and aesthetics of famous artists. Here’s a list of artist-inspired styles for Stable Diffusion along with explanations and examples.(cheatsheat link is at the bottom of article)1. Vincent van GoghDescription:Vincent van Gogh is known for his bold, dramatic brush strokes and vibrant color palettes. His style often features swirling, emotive lines and a unique use of light and shadow, which creates a sense of movement and intensity in his paintings.Example Prompt:"A starry night over a quiet village, in the style of Vincent van Gogh."Example Image:An image featuring swirling, vivid blues and yellows, with expressive, thick brush strokes depicting a night sky full of swirling stars over a tranquil village scene.2. Pablo PicassoDescription:Pablo Picasso, a pioneer of Cubism, often used geometric shapes and fragmented forms to represent subjects from multiple angles. His work ranges from the abstract and surreal to more realistic depictions.Example Prompt:"A portrait of a woman with fragmented features and geometric shapes, in the style of Pablo Picasso."Example Image:An image showing a woman's face divided into angular, geometric planes with a mixture of sharp and soft edges, capturing the essence of Cubist abstraction.3. Claude MonetDescription:Claude Monet, a founder of French Impressionism, is famous for his soft, diffused brushwork and focus on light and its changing qualities. His paintings often feature landscapes, gardens, and water scenes with a dreamy, almost ethereal quality.Example Prompt:"A serene garden with a pond filled with water lilies, in the style of Claude Monet."Example Image:An image displaying a tranquil garden scene with soft, blurry brush strokes, capturing the shimmering reflections on a pond filled with delicate water lilies.4. Salvador DalíDescription:Salvador Dalí is renowned for his surrealistic works, which often feature dreamlike, bizarre, and fantastical elements. His paintings frequently incorporate melting objects, distorted forms, and an extraordinary attention to detail.Example Prompt:"A melting clock draped over a tree branch in a desert landscape, in the style of Salvador Dalí."Example Image:An image illustrating a surreal desert scene with a distorted clock seemingly melting over a tree branch, creating a dreamlike, otherworldly atmosphere.5. Frida KahloDescription:Frida Kahlo's work is characterized by its vibrant colors, strong emotional content, and elements of Mexican folk art. Her paintings often include self-portraits and symbolic imagery, reflecting her personal experiences and cultural identity.Example Prompt:"A vibrant self-portrait with symbolic elements and Mexican folk art motifs, in the style of Frida Kahlo."Example Image:An image depicting a vivid self-portrait with rich colors and intricate details, featuring symbolic items like flowers, animals, and traditional Mexican patterns.6. H.R. GigerDescription:H.R. Giger is known for his dark, biomechanical art style, blending human and machine elements in a surreal, often unsettling manner. His works frequently explore themes of dystopia and alien forms.Example Prompt:"A futuristic cityscape with biomechanical structures and eerie, surreal elements, in the style of H.R. Giger."Example Image:An image showing a dystopian city with intricate, biomechanical buildings and a dark, eerie atmosphere, combining organic and mechanical features.7. Georgia O'KeeffeDescription:Georgia O'Keeffe is celebrated for her large-scale close-ups of flowers and desert landscapes. Her style emphasizes simplicity, bold colors, and abstract forms inspired by nature.Example Prompt:"A close-up of a vibrant flower with abstract shapes and rich colors, in the style of Georgia O'Keeffe."Example Image:An image featuring a striking close-up of a flower, with smooth, flowing lines and bold, saturated colors, capturing the essence of natural beauty in an abstract form.8. Katsushika HokusaiDescription:Katsushika Hokusai, a Japanese ukiyo-e artist, is best known for his woodblock prints featuring landscapes and scenes from everyday life, particularly "The Great Wave off Kanagawa." His style is marked by intricate details and fluid lines.Example Prompt:"A powerful ocean wave with Mount Fuji in the background, in the style of Katsushika Hokusai."Example Image:An image illustrating a dramatic, large wave with delicate, flowing lines and intricate details, capturing the iconic style of Hokusai's woodblock prints.By using these artist-inspired styles with Stable Diffusion, users can create stunning, unique images that reflect the distinctive techniques and aesthetics of these famous artists. Whether for artistic exploration or creative projects, these prompts can help you generate visually captivating and stylistically rich artwork.Stable Diffusion Cheat Sheet is a comprehensive collection of artist-inspired styles for the Stable Diffusion AI model. It provides detailed examples and descriptions of how to generate images in the style of famous artists like Vincent van Gogh, Pablo Picasso, and Claude Monet. The cheat sheet offers guidance on various art media, including drawing, painting, and digital methods, helping users create images that reflect the unique characteristics of each artist's style.
5
How to Create Effective Prompts for AI Image Generation

How to Create Effective Prompts for AI Image Generation

In recent years, artificial intelligence (AI) technology has advanced rapidly, including in the field of image generation. One popular application of AI is generating images based on text prompts. This process, known as text-to-image generation, allows users to create digital images simply by providing a text description. This article will discuss how to create effective prompts for generating images with AI and offer tips for achieving optimal results.What is a Prompt for Image Generation?A prompt is a text description used to provide instructions to an AI model about the image you want to generate. AI models like DALL-E, Stable Diffusion, and MidJourney use these prompts to understand the context and details desired by the user, then generate an image that matches the description.How to Create an Effective PromptBe Clear and Specific: The clearer and more specific your prompt, the more accurate the generated image will be. For example, instead of just writing "dog," you could write "a golden retriever playing in a park on a sunny afternoon with a clear sky."Use Relevant Keywords: Include relevant keywords to help the AI model understand the essential elements of the image you want to create. These keywords can include the subject, setting, mood, colors, and style.Describe Emotions and Atmosphere: If you want an image with a particular mood or emotion, make sure to mention it in your prompt. For instance, "a peaceful mountain landscape with a warm sunset" provides a specific atmosphere compared to just "mountains."Include Visual Details: Visual details like colors, textures, and composition greatly assist in generating an image that matches your vision. For example, "a vintage red car with white stripes on an empty road."Experiment with Styles and Formats: If you want an image in a specific style (e.g., cartoon, realistic, painting, etc.), be sure to mention it in your prompt. For example, "a portrait of a face in cartoon style with a colorful background."Examples of Effective PromptsHere are some examples of prompts you can use as inspiration:Landscape: "A vast green valley with a river flowing through it, surrounded by distant blue mountains under a clear sky."Portrait: "A portrait of a young woman with long red hair, wearing a blue dress, standing in front of an old brick wall with soft lighting."Animals: "A white Persian cat sleeping on a brown couch in a living room decorated with green plants and sunlight streaming through the window."Fantasy: "A large dragon with shimmering silver scales flying over an ancient castle atop a mountain, with a night sky full of stars in the background."Tips for Improving ResultsProvide Enough Context: Don't hesitate to give additional context in your prompt if it helps to clarify the image you want.Use Synonyms and Variations: If the desired result isn't achieved, try using synonyms or variations of words to describe the same elements.Experiment with Prompt Length: Sometimes, longer and more detailed prompts can generate better images, but other times, shorter and more to-the-point prompts can be more effective.Use the Right Model: Each AI model has its strengths and weaknesses. Experiment with different models to find the one that best fits your needs.By understanding how to create effective prompts, you can leverage AI technology to generate stunning images that match your desires. Happy experimenting!
33